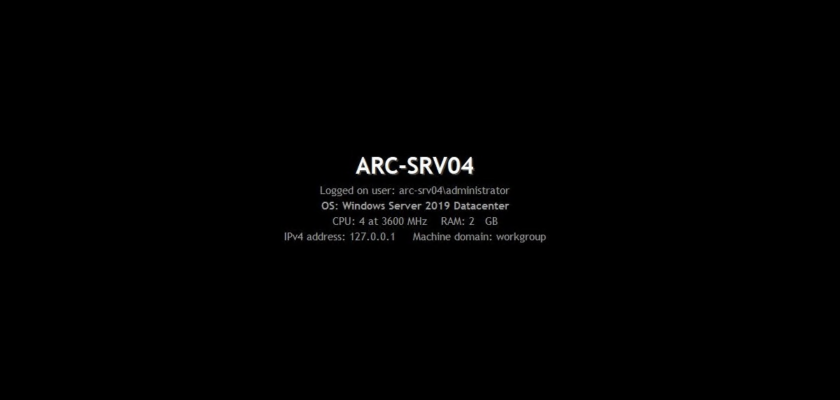
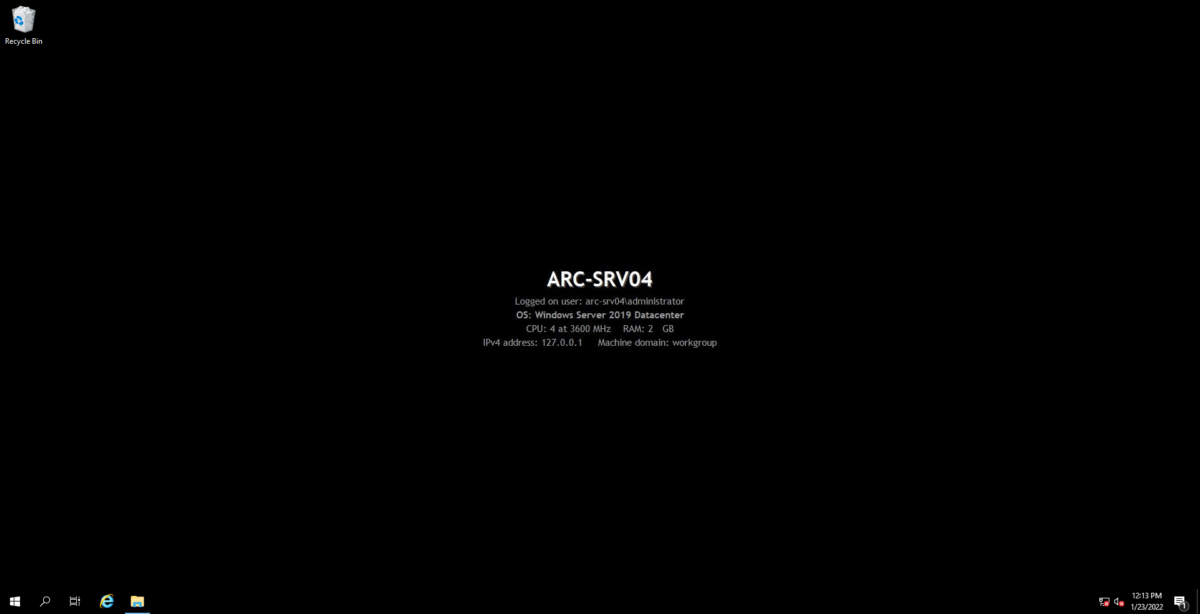
Many of you have wondered about the system information utility that Microsoft was using on MOC Labs and various events. The utility is called Backinfo and it is primarily used to display system information on the desktop such as NetBIOS name, Machine domain, and information about the CPU, memory, network, and OS.
The truth is that I prefer this utility over BGinfo which is another alternative popular. BackInfo feels clean, easy to configure and maintain.
The reason why I decided to write this post, is because many of you are searching for a system information utility and foremost because BackInfo is not being maintained or is available by Microsoft anymore. The utility was previously available with the Microsoft Windows Server System Reference Architecture Virtual Environments for Development and Test (WSSRA-VE) Deployment Kit. Unfortunately, the binaries are no longer exist. The only way to acquire this tool these days is from the community 🙂 I’ve created a Github repo, that contains the binaries of the utility, in an attempt to keep lights on for this utility.
Feel free to use the following link down below to grab a copy!
Download Link – File Hash SHA256: 977168A6FA431A439FA26792B798B0D5C39A8A219746E8FABC4531A43B7627
How to use it
Now that you hold a copy of this utility, how can you make use of it? Well, if you examine closely the contents of the folder, you will notice 2 files, the application .exe file, and the configuration .ini file. No setup or installation is needed.

If you do like the information illustrated in the picture up above, then you don’t need to make any changes to the configuration file. In case you would like to add or remove information to be displayed, then feel free to edit the configuration file. These two files must and should always remain within the same folder!
File Placement
I usually prefer to place the application files under “C:\Program Files\BackInfo” but nevertheless, you could always choose a different location on your systems.
Make BackInfo load during system startup
In order for this utility to function properly, and display system information, it must be executed during system startup. In order to accomplish that, there are three possible methods:
- Registry
Create, set, and forget, a registry key under subkey “HKLM:\SOFTWARE\Wow6432Node\Microsoft\Windows\CurrentVersion\Run” that will point to the application file. This will ensure that the application will run during system startup.
Use the following PowerShell one-liner to create the required key, modify the path of the application in case that is stored elsewhere other than Program Files.
New-ItemProperty -Path "HKLM:\SOFTWARE\Wow6432Node\Microsoft\Windows\CurrentVersion\Run" -Name BackInfo -Type String -Value "C:\Program Files\BackInfo\Backinfo.exe"- Placing application shortcut on Startup folder
Create a shortcut pointing to the application under “C:\ProgramData\Microsoft\Windows\Start Menu\Programs\StartUp”. This will ensure that the application will run during system startup.
Use the following PowerShell script to create the required shortcut, modify the path of the application in case that is stored elsewhere other than Program Files.
$SourceFilePath = "C:\Program Files\BackInfo\BackInfo.exe"
$ShortcutPath = "C:\ProgramData\Microsoft\Windows\Start Menu\Programs\StartUp\BackInfo.lnk"
$WScriptObj = New-Object -ComObject ("WScript.Shell")
$shortcut = $WscriptObj.CreateShortcut($ShortcutPath)
$shortcut.TargetPath = $SourceFilePath
$shortcut.Save()- A combination of any of the above methods with Group Policy
When managing a large number of servers or even a dozen, going manual as described above definitely is not an option. The most suitable option would be PSRemoting, DSC but the best one, if the servers are domain members, would be Group Policy.
Configuring BackInfo on multiple servers using Group Policy
- Place the files on a network location that is accessible by all server systems within your environment. This might be e.g a File Server or the Netlogon Folder.
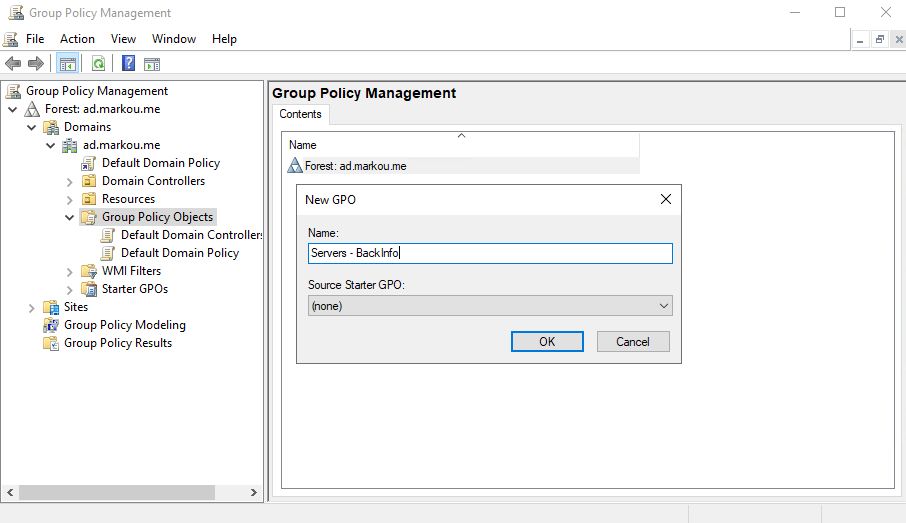
- Create a new Group Policy Object.
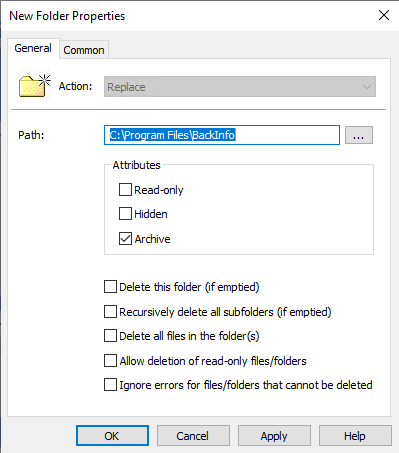
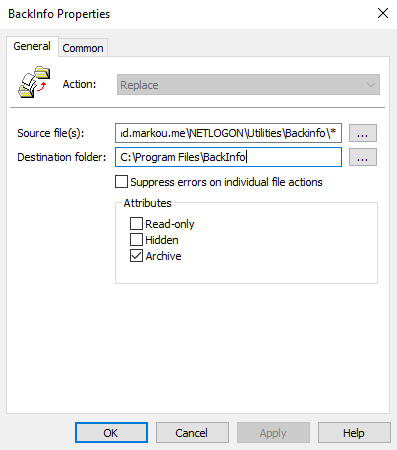
4. Computer Configuration -> Preferences -> Windows Settings -> Files -> New File. Use the following settings, on Tab Common make sure that “Remove this item when it is no longer applied” is checked.
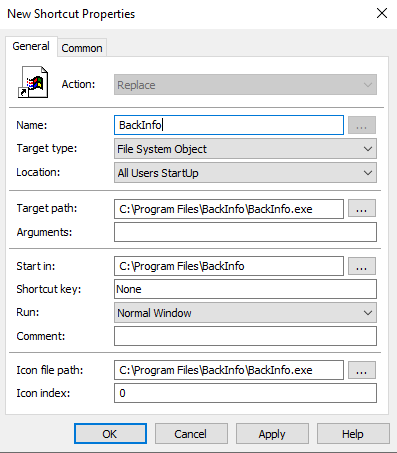
5. Computer Configuration -> Preferences -> Windows Settings -> Shortcuts -> New Shortcut. Use the following settings, on Tab Common make sure that “Remove this item when it is no longer applied” is checked.
6. Link the newly created Group Policy to the OU of your preference.
7. Wait for the effect to take place. By default, the computer Group Policy is refreshed every 90 minutes.
8. Enjoy!
Thanks for reading my blog!
Feel free to drop your comment or question below.
[…] Click for Original Content Writer […]