When you start planning for Azure MFA, the first thing that comes to mind is the Administrative effort and the user experience. Better user experience equals fewer phones and support requests from your users.
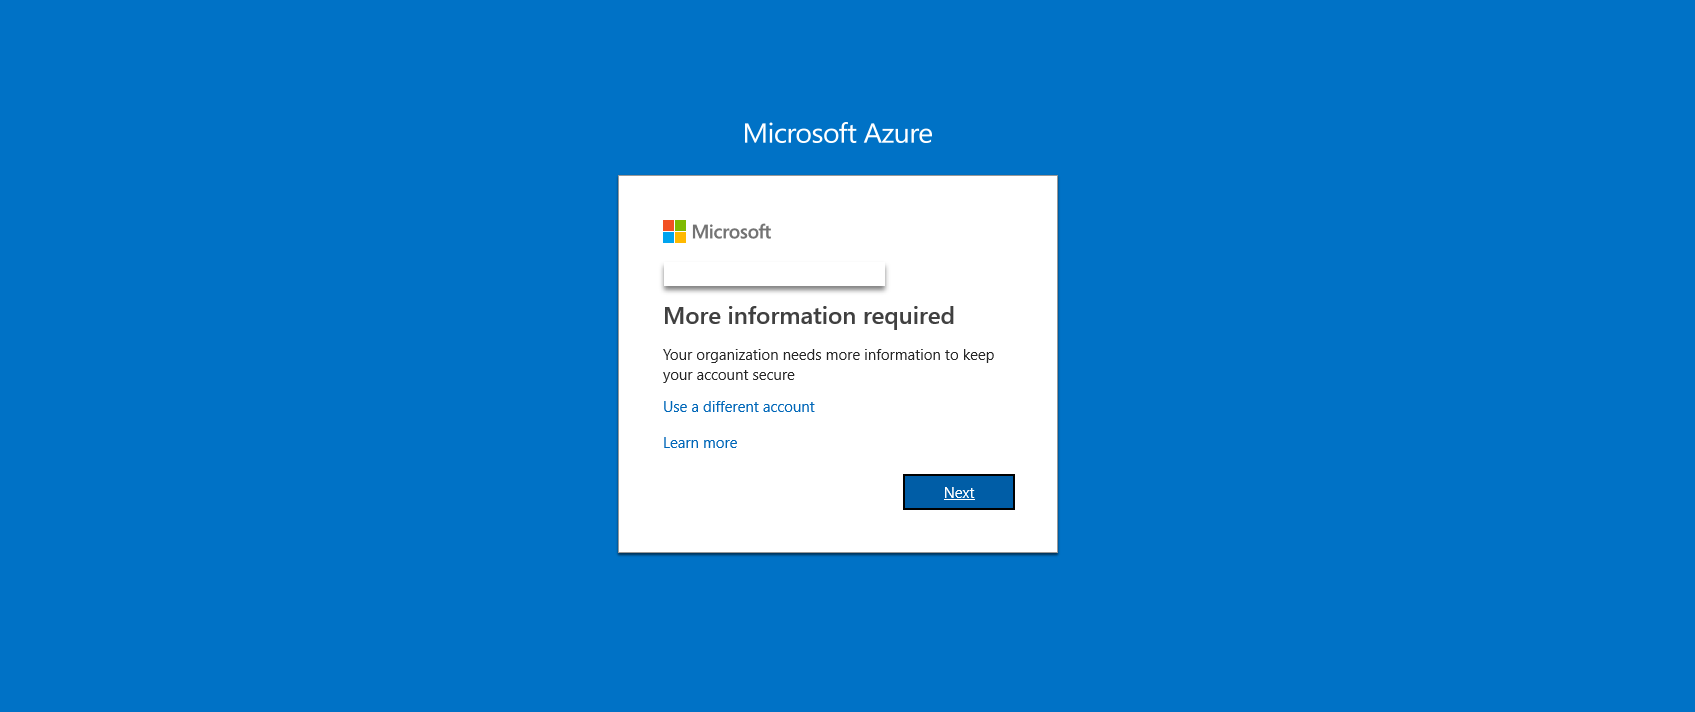
Once you enable MFA for a user, the next time that user will try to authenticate against Azure
During the enrollment process, the user must specify authentication data such as Authentication Phone for call or text and Mobile App options. What about typos? Imagine a user trying to sign in and the Text Message with the verification password never arrives.
What can be done? Two options here. If the users exist in a local AD environment and their data are being synchronized, then we can make sure that the users’ mobile number attribute is the appropriate one and up to date. If we don’t maintain such information in the local AD then we could do a bulk import straight to Azure AD.
How can this be accomplished? Just a bit of PowerShell, Excel skills and magic is enough 🙂 If you haven’t already acquired/installed AzureAD PowerShell module, you are going to need to. The following cmdlet will do the trick.
Install-Module AzureADOnce you installed the module, you ‘ll have to connect to your Azure AD Directory from a PowerShell prompt.
Connect-AzureADNow the boring part, you need to create a CSV file containing all the users that are required to bulk update their Contact Info (Mobile). Two options here, either you get an export an inventory through PowerShell or you could create a CSV File of your own as mentioned (time-consuming). Let’s go through with Option 1.
Option 1: Get a detailed user inventory using PowerShell and Azure AD Module.
Get-AzureADUser | export-csv -Path "PathToYourFile" -NoTypeInformationNow that we have the CSV, update the Mobile information for each user.
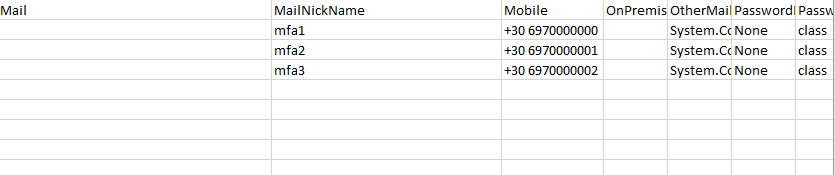
Once you finish editing the CSV, save it and return to the PowerShell prompt. Now use the following cmdlet to update the Contact info for your users.
Import-CSV -Path "PathToYourCSVFile" | ForEach-Object { Set-AzureADUser -ObjectId $_.UserPrincipalName -Mobile $_.Mobile }Head back to

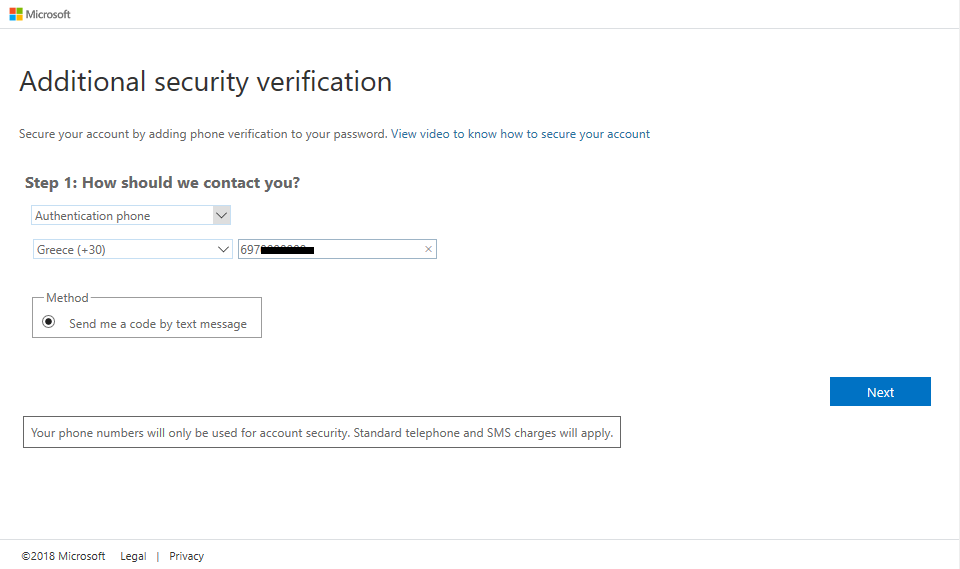
From now on, the user will get his contact info already filled during the MFA enrollment process.
What about SSPR?
Self-service password reset (SSPR) is a great feature which enables users to reset their passwords or unlock their accounts.
What can I do to provide a better SSPR registration experience to my users?
Now that MFA and authentication data are in place, users can immediately use those values to reset their passwords even if they haven’t registered for the service! In addition, users see those values when they register for the first time, and they can modify them if they want to. After they register successfully, these values will be persisted in the Authentication Phone and Authentication Email fields, respectively.
Additional Resources:
- https://docs.microsoft.com/en-us/azure/active-directory/authentication/
- https://docs.microsoft.com/en-us/azure/active-directory/authentication/howto-sspr-deployment
Thanks for reading!
You must be logged in to post a comment.