Windows Admin Center is becoming more and more popular day by day and the adoption rate rising hot! Server Management is something that Microsoft is investing serious time and effort and that’s why this product is only getting better. In this post, I will not go through the very basics since the product is being around now for approximately 1,5 years.
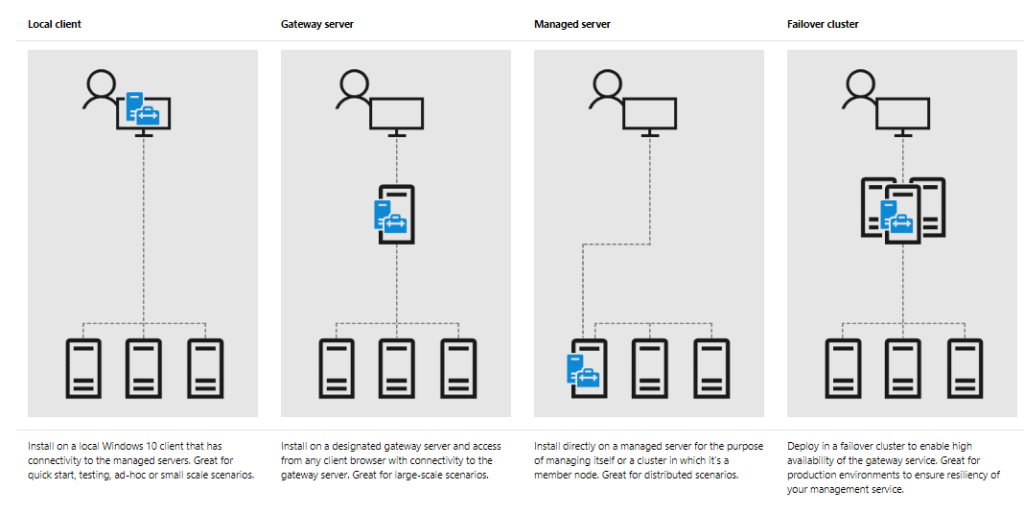
The only thing that needs to be mentioned again, is the supported deployment options. You have the ability to choose among 4 different deployment flavors as shown in the picture below.
During this how-to guide, we will go through the option of installing Windows Admin Center on a Server Core and use it as a Gateway server. Also, we will go through the configuration basics using the GUI and…PowerShell of course! The configuration basics will be covered in another post, part 2 of this how-to guide.
The process described below is as much minimalistic as Server Core. That is why we plan to use the bare minimum tools to achieve our goal! Again, PowerShell to the rescue!
Installing #WAC on Server Core
Establish a remote connection to the target server by using PowerShell Remoting. This will allow you to perform the installation straight from the remote PowerShell session.
Enter-PSSession -ComputerName RemoteServerCoreHost -Credential mydomain\myuser
Once you are connected, create a temporary directory where the Windows Admin Center binaries will be downloaded into.
New-Item -Path C:\Downloads -ItemType directory
Download Windows Admin Center binaries from Microsoft.
wget "http://aka.ms/WACDownload" -outfile "C:\Downloads\WindowsAdminCenterCurrent.msi"
Initiate the installation of Windows Admin Center using the following parameters (using a self-signed certificate and port 443).
cd C:\Downloads ; msiexec /i WindowsAdminCenterCurrent.msi /qn /L*v log.txt SME_PORT=443 SSL_CERTIFICATE_OPTION=generate
However, there is always the option to use a different port such as a certificate that you currently own. Make sure you specify the certificate thumbprint in the on-liner below.
cd C:\Downloads ; msiexec /i WindowsAdminCenterCurrent.msi /qn /L*v log.txt SME_PORT=443 SME_THUMBPRINT=(ssl certificate thumbprint) SSL_CERTIFICATE_OPTION=installed
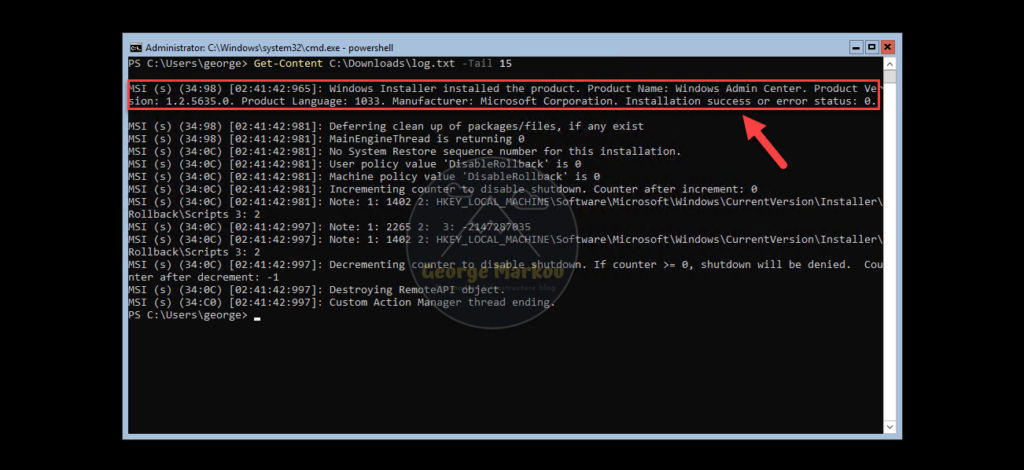
Examine the installation log and verify that the installation was successful. If yes, you will find the following message contained in the log as shown below.
Get-Content C:\Downloads\log.txt -Tail 20
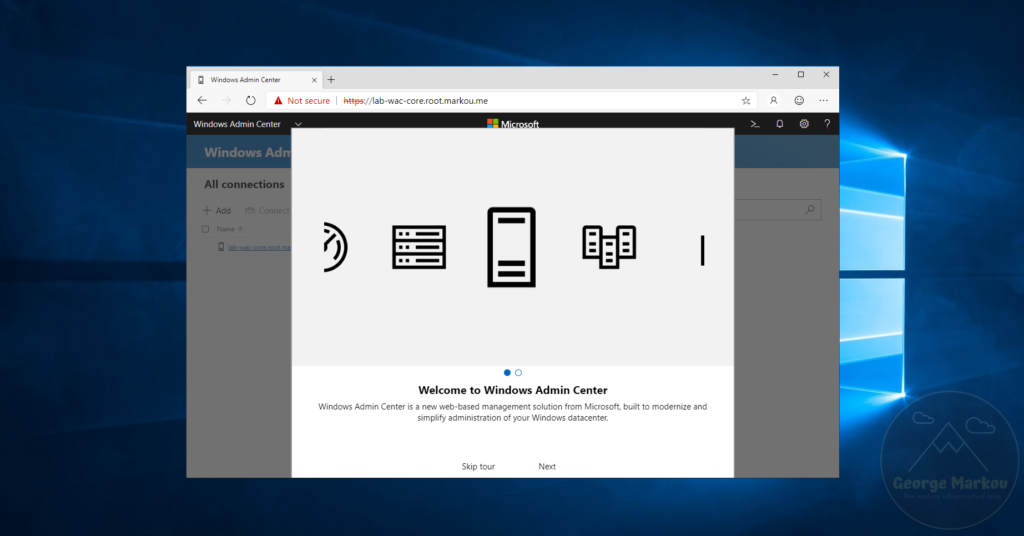
Now that we verified the installation was successful, let’s try out launching a browser and access our freshly installed Windows Admin Center instance!
Stay tuned for part 2..
Until then, enjoy managing servers with #WAC!
Thanks for reading my blog!
Feel free to drop your comment or question below.
[…] Источник […]