
Azure FileShares are fully managed file shares in the public cloud that are accessible from anywhere using the Server Message Block protocol (SMB). They can be used with and accessed concurrently by both on-premises and cloud systems, Windows Desktop or Server, Linux and MacOS operating systems.
They are mainly used for storing file data. But, before we go deeper into this post let’s agree on something first. DATA must be PROTECTED! The same applies both for data hosted in the cloud and on-premises.
When it comes to Azure FileShares, Azure ensures that the engine running under the hood (at the infrastructure level) will keep spin, meaning that it will protect us from any unexpected data loss that may occur due to DataCenter or even from simple and common hardware failures. What about the human factor or other possible causes such as accidental deletion (batch job, systems) or even ransomware? Nope, nothing, zero. Why? By design of course.
How can you protect files hosted on an Azure FileShare?
I give you 3 options:
Azure Backup
- It’s a SaaS service.
- A pure Backup solution that requires minimum configuration.
- Protects both Cloud and On-Prem workloads.
- Supports custom schedules and monitoring.
- Offers retention for both maintained and deleted backup data.
- Data could be Locally or Geo-redundant.
To start protecting Azure FileShares or any other supported workload with Azure Backup, you need first to provision an Azure Recovery Services Vault. The Vault must be provisioned in same the region as your workloads.
Let’s quickly go through the process of setting up a backup job which will allow us to protect one or many Azure FileShares.
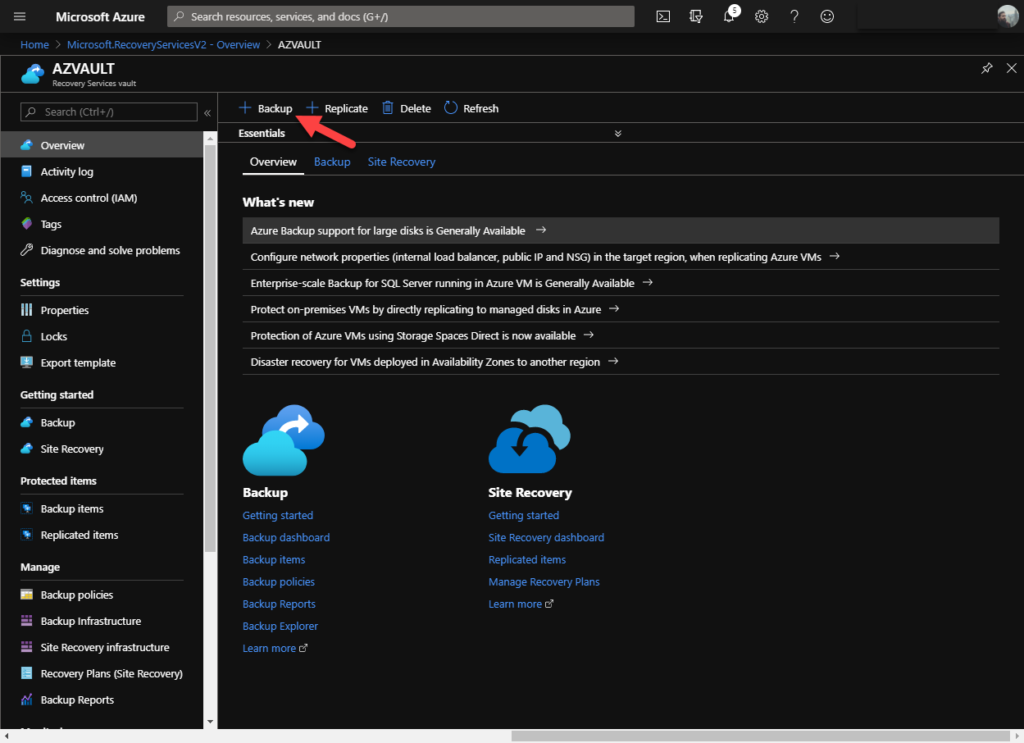
Navigate to Azure Recovery Services Vault, click on the “Backup” button.
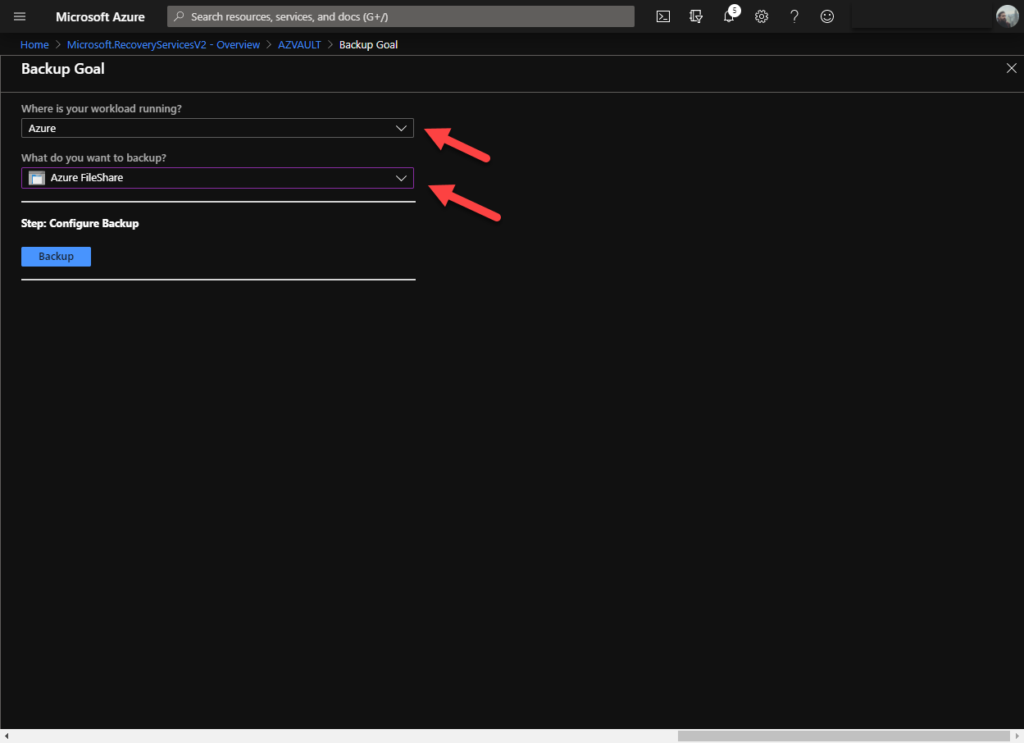
Choose your workload location which in our scenario is in Azure and as for type, choose Azure FileShare and hit the “Backup” button.
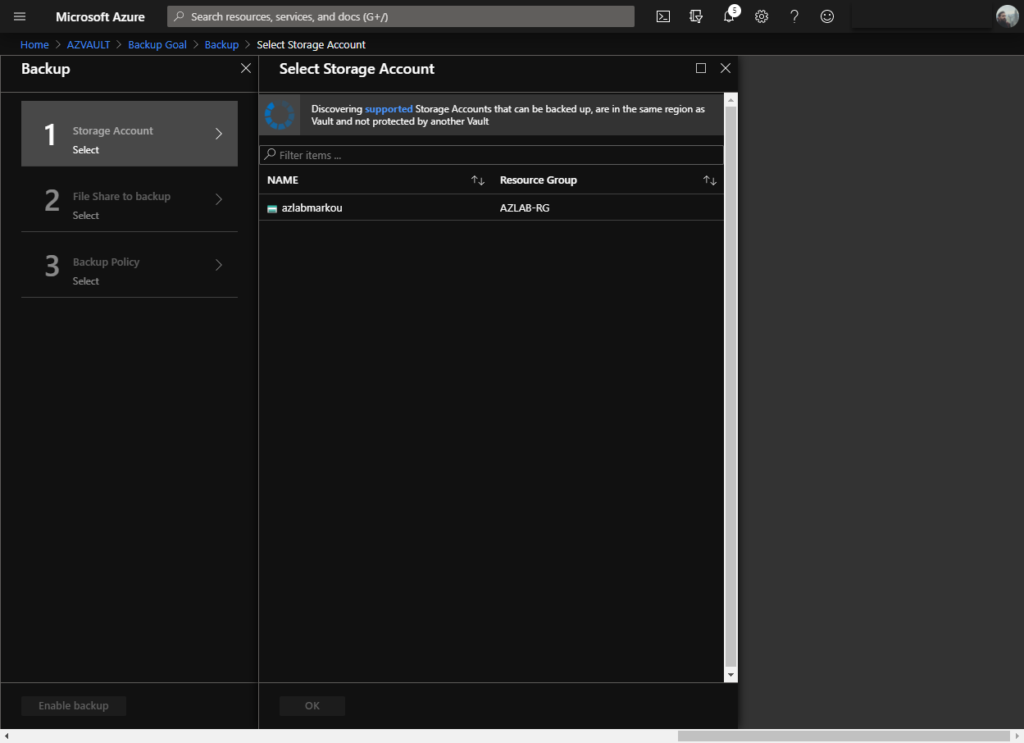
Select the Storage Account in which your Azure FileShare resides and click on the OK button.
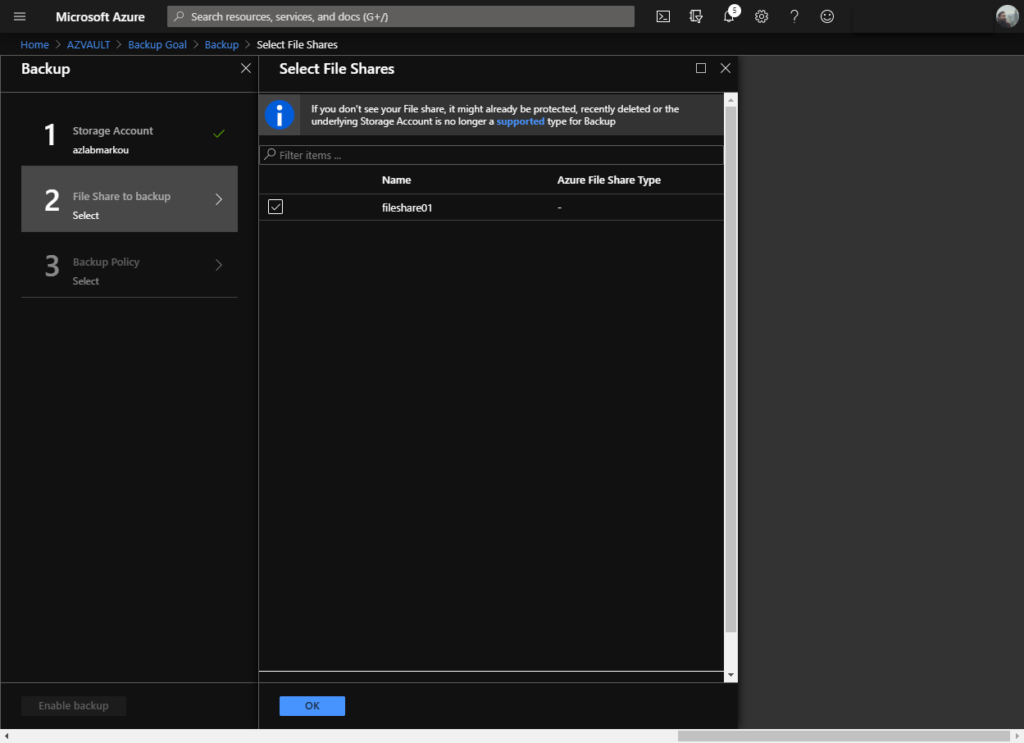
Select the Azure FileShare and click on the OK button.
Specify a Backup Policy. If there isn’t any in place, create a new one using your own preferences and click on the OK button.
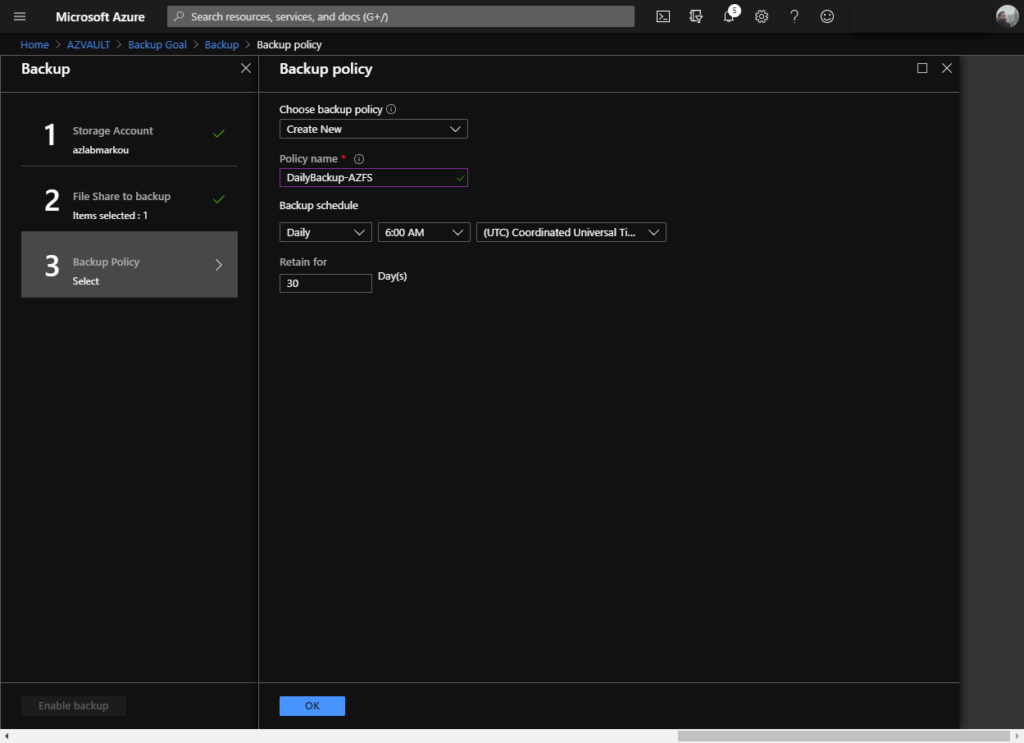
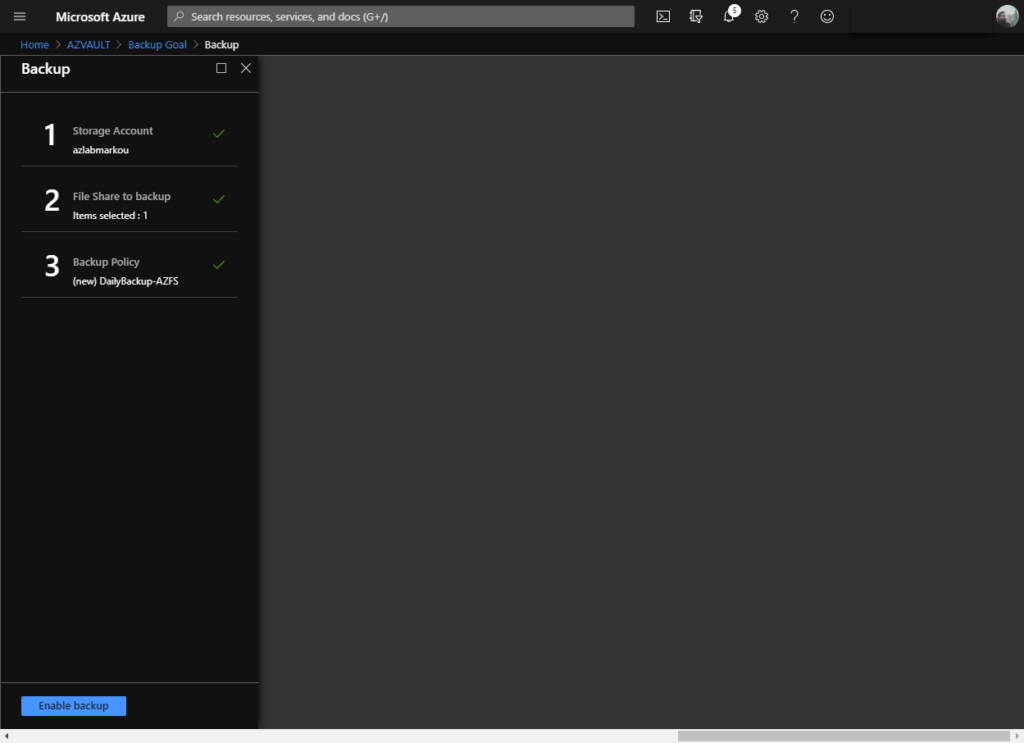
After validation completes, click on the “Enable Backup” button.
Azure FileShare snapshots
- A point-in-time, read-only restore point of your data.
- It could be used as a “temporary” backup method.
- No out-of-the-box scheduling or retention. It can be triggered manually or in a more automatic way by leveraging Azure Automation and a bit of code.
- It’s not fancy. Does exactly what it says on the tin.
Let’s quickly go through the process of leveraging FileShare snapshots through the portal.
Navigate to the storage account where the FileShares reside, click on any FileShare.
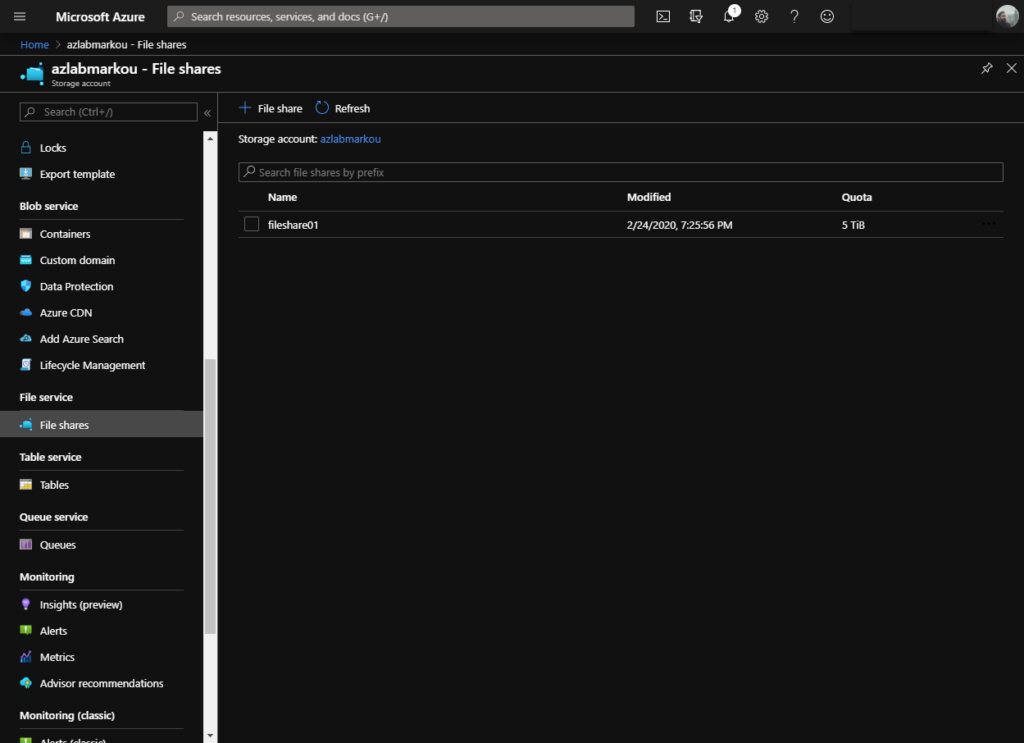
Choose snapshots, click on the “Add snapshot button” to commence a manual snapshot of your storage account.
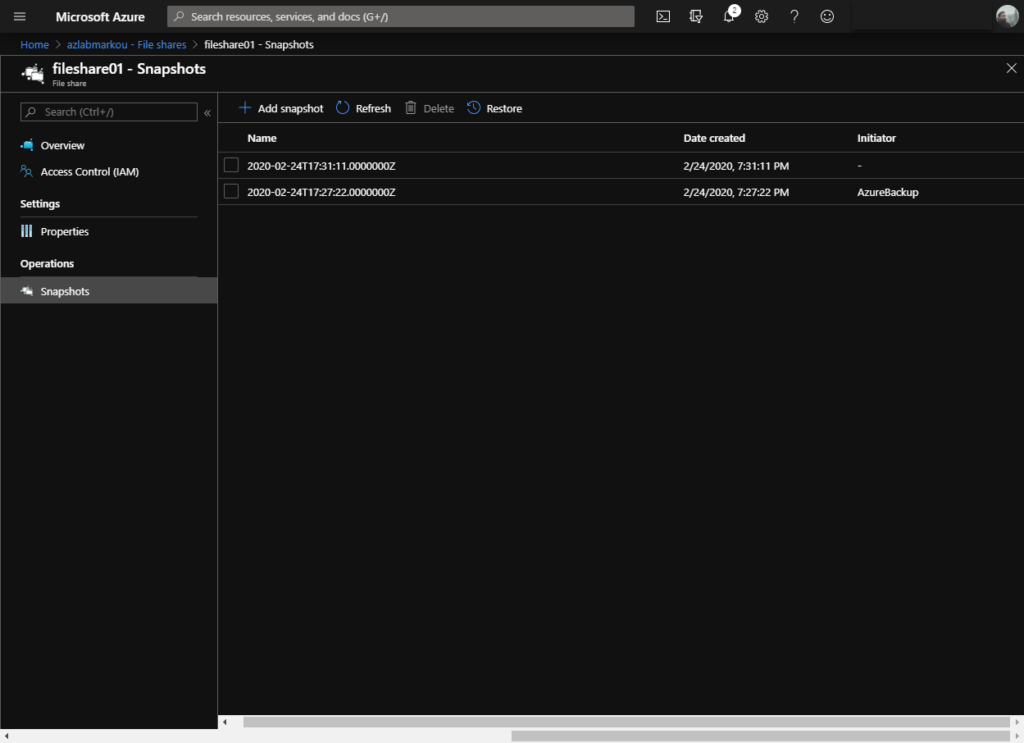
That’s it, simple as that!
3rd party Backup products
Any other backup product that could potentially backup and protect SMB shares. My pick for all of you, Veeam’s Backup suite! Veeam V10 recently went GA and brought along a whole bunch of new features. One of the most anticipated features is definitely the possibility to protect NAS systems, whether they host SMB shares or NFS exports, both on-premises and in the cloud!
Let’s quickly go through the process of protecting an Azure FileShare using Veeam’s Backup & Replication Suite.
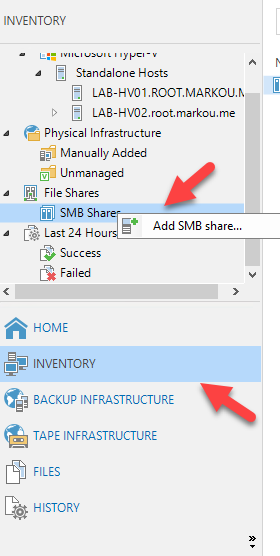
Navigate to Veeam BR console, go to inventory, File Shares, right-click on “SMB Shares” and choose “Add SMB Share“.
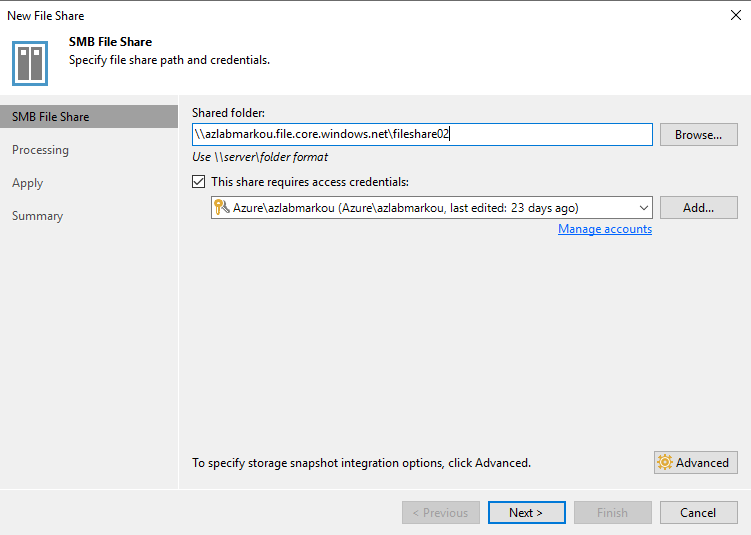
Type the Azure FileShare address using a UNC format as shown below. Add the required credentials for accessing the FileShare and click on Next.
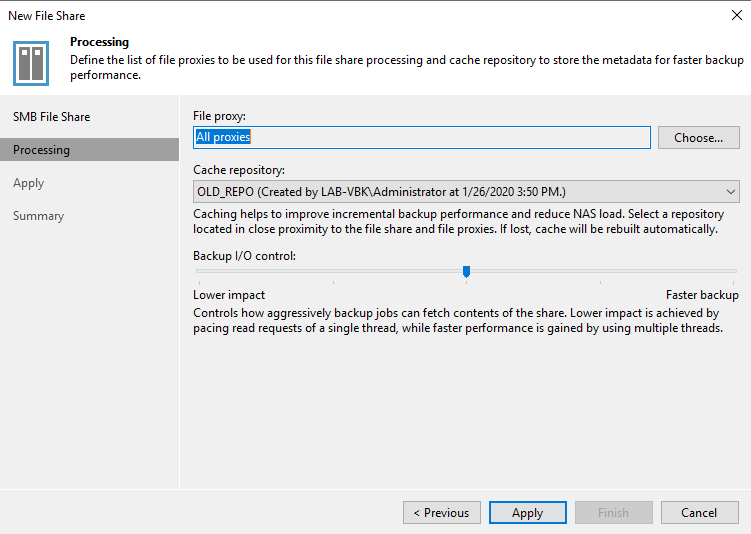
Choose a File Proxy, if there isn’t any other than Veeam BR server, then leave it as it is shown below and click on Apply.
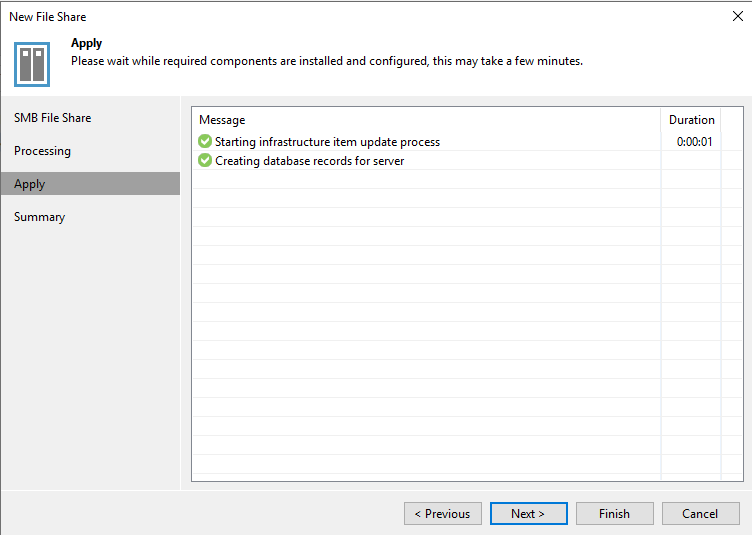
Click on Finish to exit the wizard.
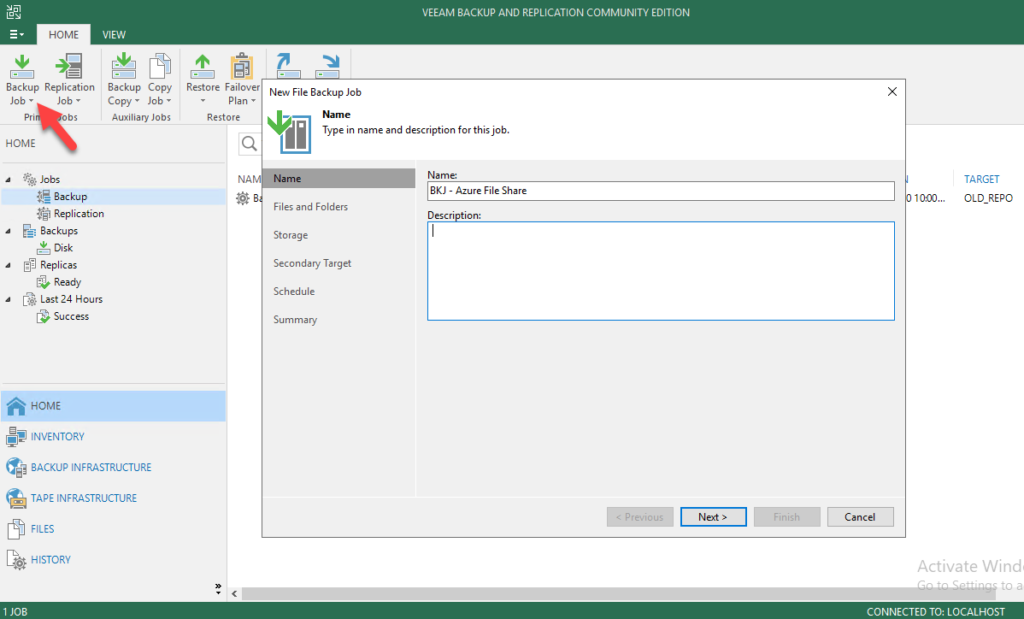
Now navigate through the console back to Home view, click on Backup Job and choose File Share from the drop-down menu. In the New File Backup Job wizard, type a name of your own preference and click on Next.
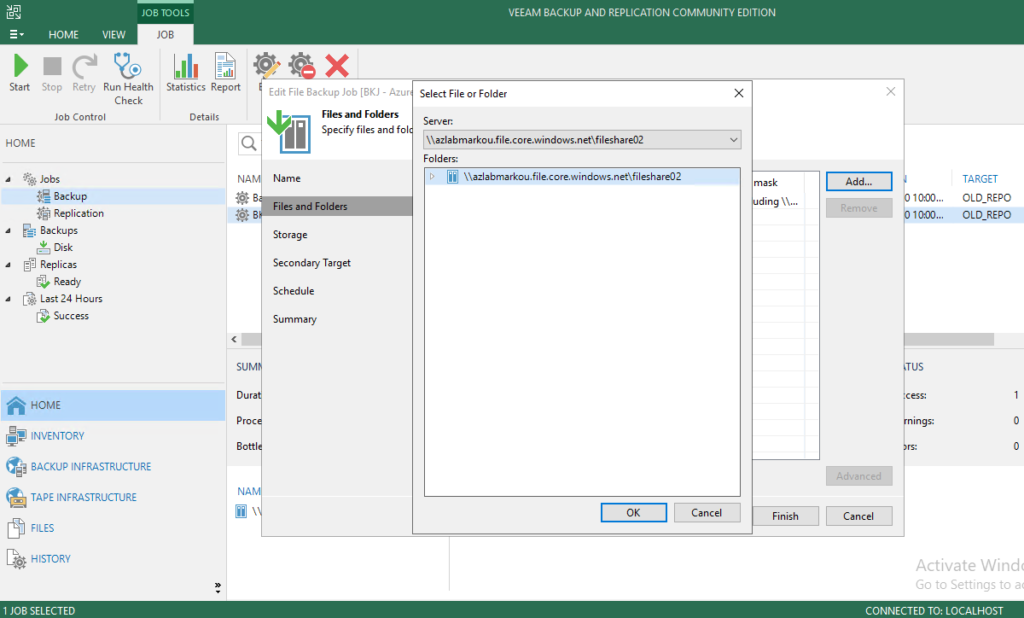
Click the Add button to add the Azure FileShare we added in a previous step. Click on Finish upon completion.
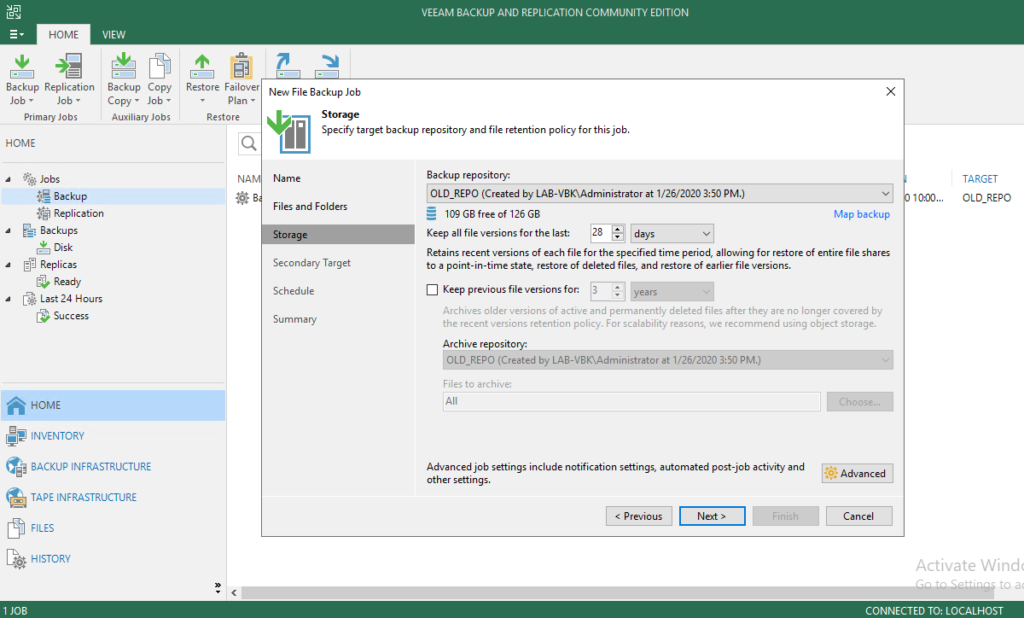
Specify the Backup Repository where the backup data will be retained, the retention period and click on Next.
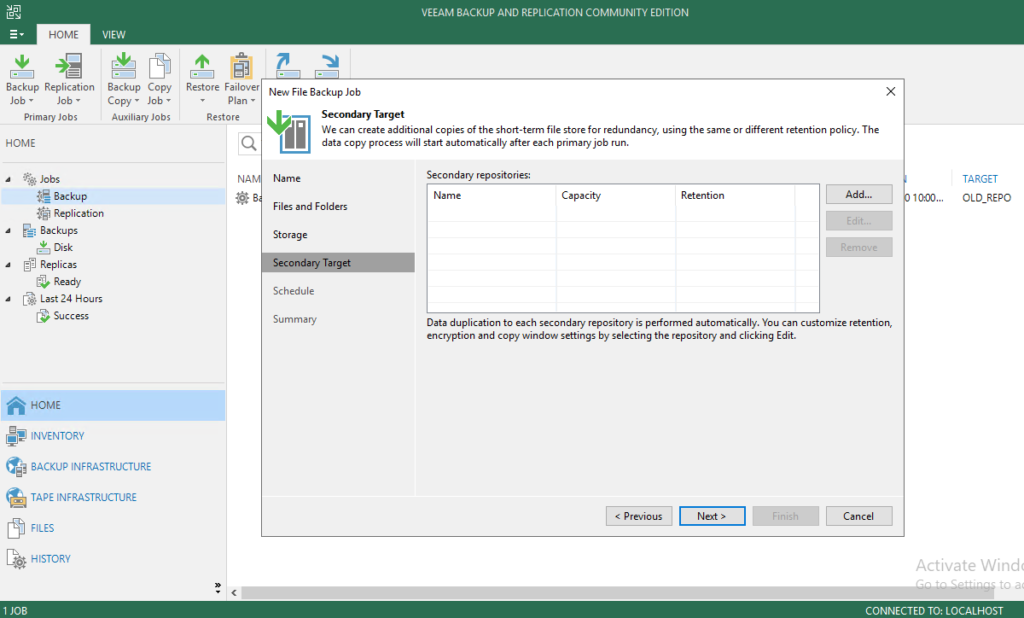
Additionally, you have the option to configure a secondary backup target while in the wizard.
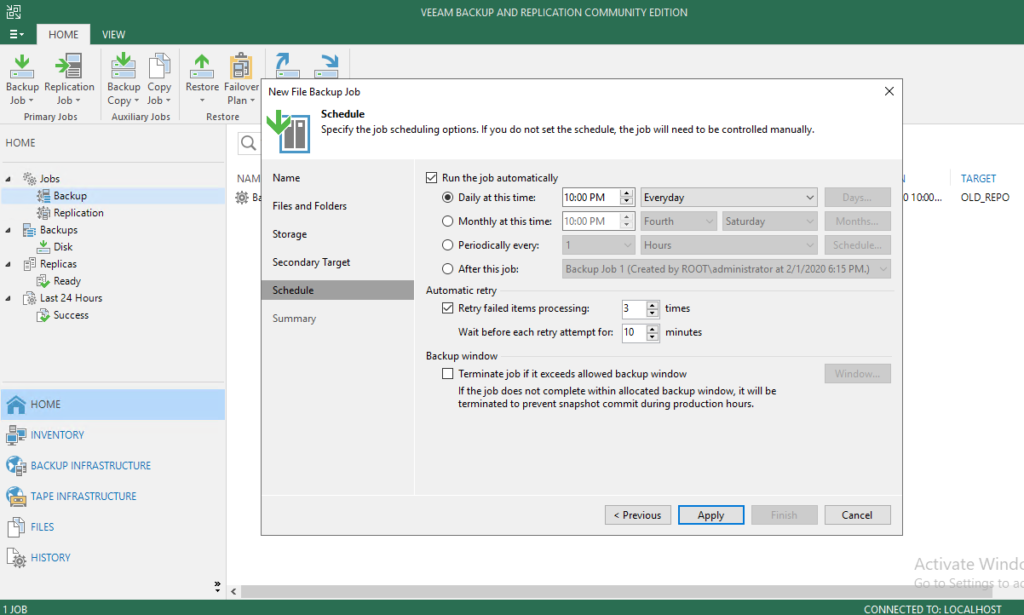
Configure the frequency of the occurrence and click on Apply.
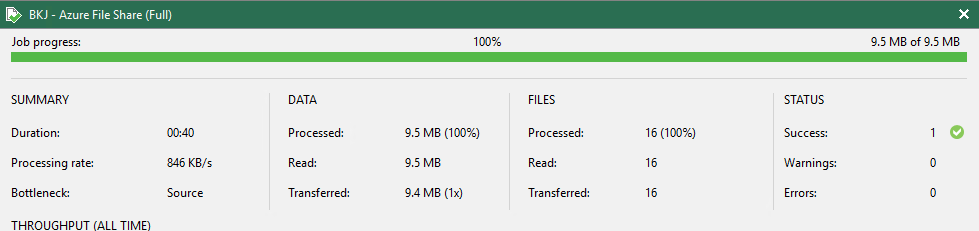
This a small in terms of capacity FileShare but nevertheless it took only 40 seconds to complete over the public internet!
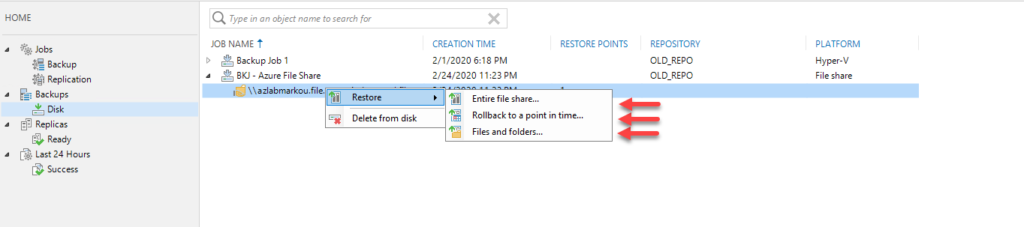
Three restore options here as shown below.
Keep it safe!
Thanks for reading!
[…] Go to Source of this post Author Of this post: George Markou Title Of post: Protecting Azure FileShares Author Link: {authorlink} […]