WSL and its newer version, WSL2, have been around for a while, just like VSCode. If you’re into Infrastructure as Code (IaC) and using languages like Bicep, here’s a question for you: Can you combine WSL and VSCode to create a neat workspace for making these templates and starting your deployments on Azure? In this blog post, I’ll show you how to use these tools together to set up a clean, organized space for your work.
Prerequisites
Before diving into the setup process, ensure your system meets these prerequisites:
- Windows 10 version 2004 or later.
- Local Admin rights.
- Visual Studio Code installed on your Windows machine.
- A basic understanding of Azure Resource Manager (ARM) templates and Bicep.
Setting Ubuntu Linux on Windows with WSL
If you haven’t configured WSL2 on your Windows machine yet, follow these steps:
Enable WSL2 and Install Ubuntu Linux
Launch PowerShell as an administrator and execute the following command:
wsl --install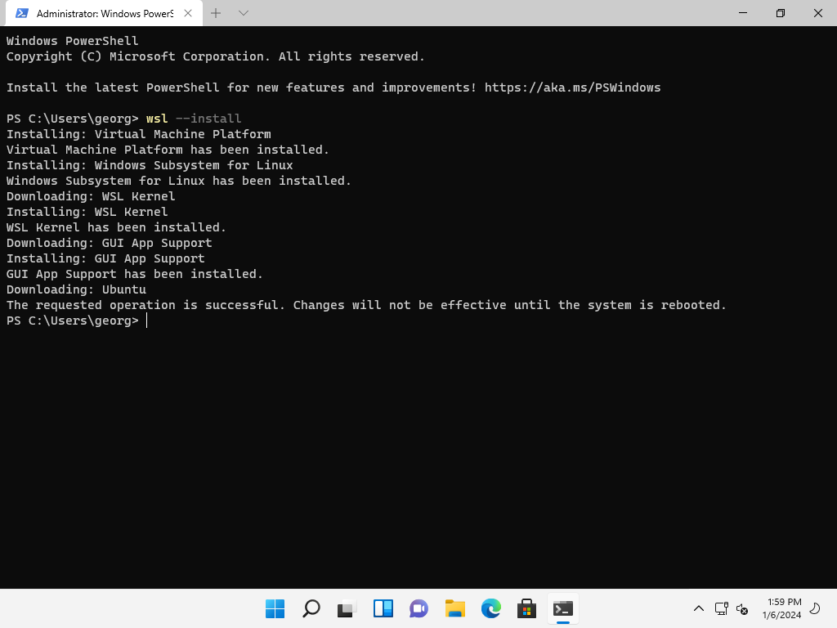
This command will enable the features necessary to run WSL and install the Ubuntu distribution of Linux. (This default distribution can be changed). Reboot your system for the changes to take effect.
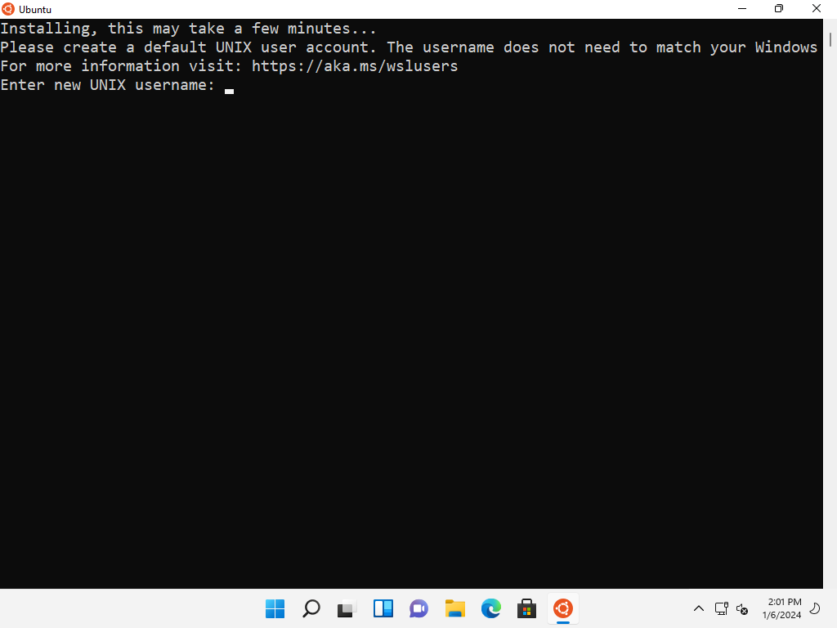
Complete the setup
After rebooting your machine, WSL will automatically launch to complete the configuration. When prompted, please set up a User Name and Password for the newly installed distribution.
Update package lists and packages
While in WSL, use the following command to update and upgrade packages:
sudo apt update && sudo apt upgradeInstalling Required Tools in WSL
Before diving into Bicep template authoring within WSL 2, it’s vital to ensure you have the essential tools installed. You’ll need Bicep CLI, Git, Azure CLI, and PowerShell Core, especially the latter two, as they’re fundamental for a smooth authoring experience.
Installing Bicep CLI
Open a terminal within VSCode connected to WSL 2 and follow these steps:
a. Update package lists and install prerequisites:
sudo apt update
sudo apt install -y curlb. Download and install the Bicep CLI using curl:
# Return to home directory
cd

# Fetch the latest Bicep CLI binary
sudo curl -Lo bicep https://github.com/Azure/bicep/releases/latest/download/bicep-linux-x64

# Mark it as executable
sudo chmod +x ./bicep

# Add bicep to your PATH (requires admin)
sudo mv ./bicep /usr/local/bin/bicep

# Verify Bicep installation
bicep --version
Installing Git
Git can be installed in the WSL 2 environment to manage version control for your Bicep templates Install Git using the package manager:
# Install the latest version of Git
sudo apt install -y git

# Verify the Git Installation
git --version
Installing Azure CLI
Azure CLI allows interaction with Azure resources. Here’s how to install it:
a. Install the prerequisites for Azure CLI:
# Return to home directory
cd

# Install the latest version of Azure CLI
curl -sL https://aka.ms/InstallAzureCLIDeb | sudo bash

# Verify the Git Installation
az --version
OPTIONAL: Installing PowerShell Core and Az PowerShell module
For those of you who are acquainted more or want to be able to switch at any given time to PowerShell, there is the possibility to install PowerShell Core, the cross-platform version of PowerShell using the steps down below:
# Return to home directory
cd

# Update the list of packages
sudo apt-get update

# Install pre-requisite packages.
sudo apt-get install -y wget apt-transport-https software-properties-common

# Get the version of Ubuntu
source /etc/os-release

# Download the Microsoft repository keys
wget -q https://packages.microsoft.com/config/ubuntu/$VERSION_ID/packages-microsoft-prod.deb

# Register the Microsoft repository keys
sudo dpkg -i packages-microsoft-prod.deb

# Delete the Microsoft repository keys file
rm packages-microsoft-prod.deb

# Update the list of packages after we added packages.microsoft.com
sudo apt-get update

###################################
# Install PowerShell
sudo apt-get install -y powershell

# Start PowerShell
pwsh

# Install Az PowerShell module
Install-Module -name Az -Force -Verbose
To switch between bash and PowerShell within WSL, enter ‘pwsh’. To return to bash while in WSL, type ‘bash’.
Integrating VSCode with WSL
Now that WSL is fully configured and prepared for compiling ARM Bicep Templates, let’s seamlessly integrate it with Visual Studio Code for an enhanced development experience.
a. Install the WSL extension for VSCode. Open VSCode, when prompted install WSL extension from Microsoft.
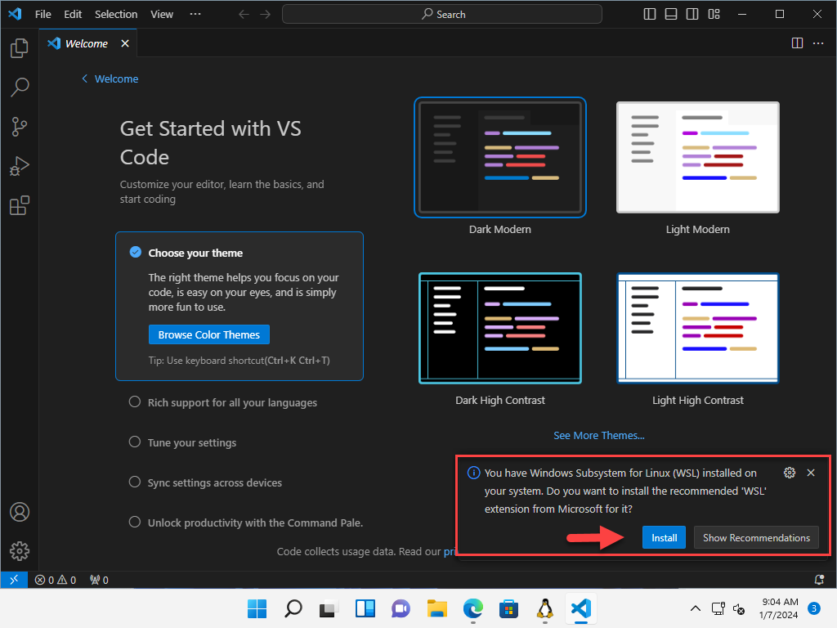
Once the extension is installed, close the application and launch a new VSCode window.
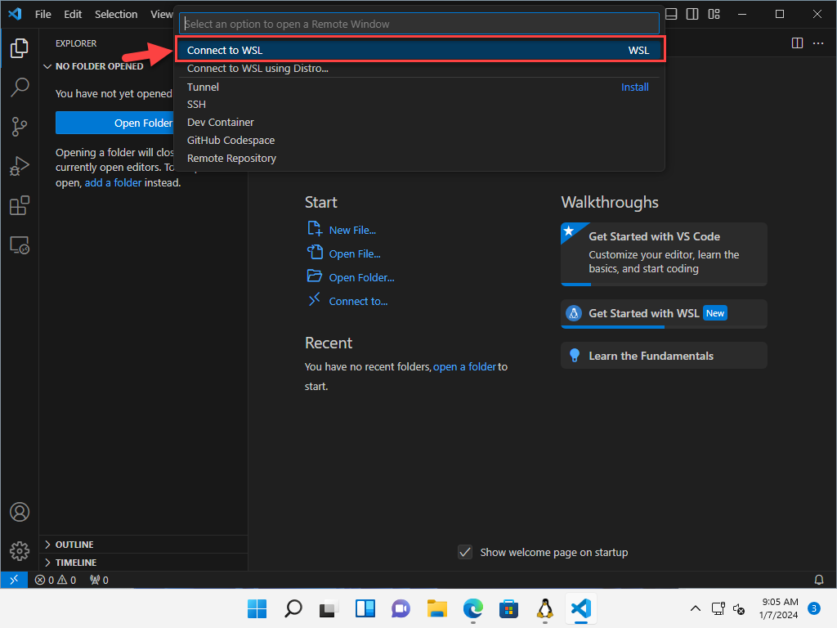
Press F1 to open the command palette, type “WSL: Connect to WSL” and select it. This will open a new VSCode window connected to your WSL environment.
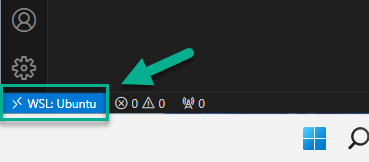
Once you’ve configured the VSCode instance with WSL, you’ll see a caption in the bottom left corner of the VSCode indicating ‘WSL: Ubuntu’.
Next on the list is installing the essential VSCode extensions. The following extensions are crucial addition that significantly enhances the authoring and deployment experience for ARM Bicep Templates.
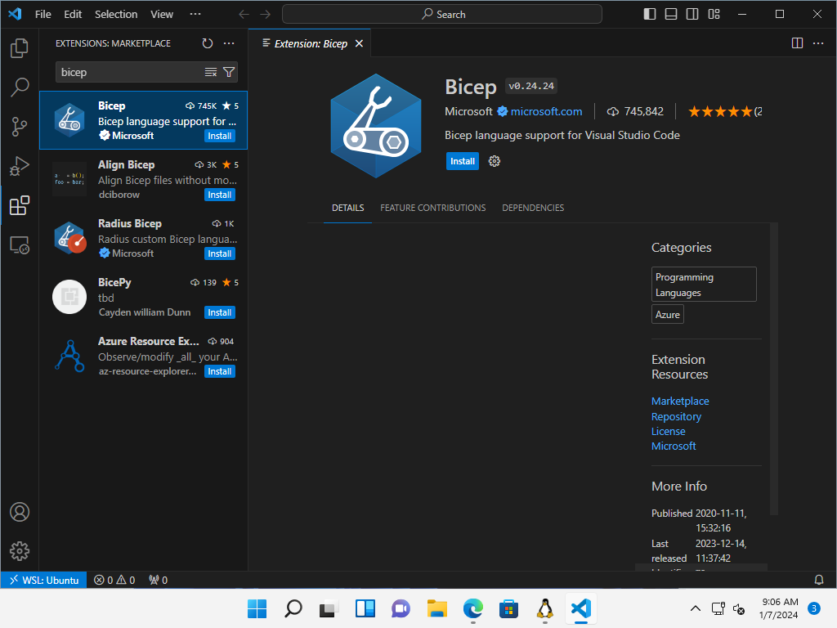
b. Install Bicep extension for VSCode.
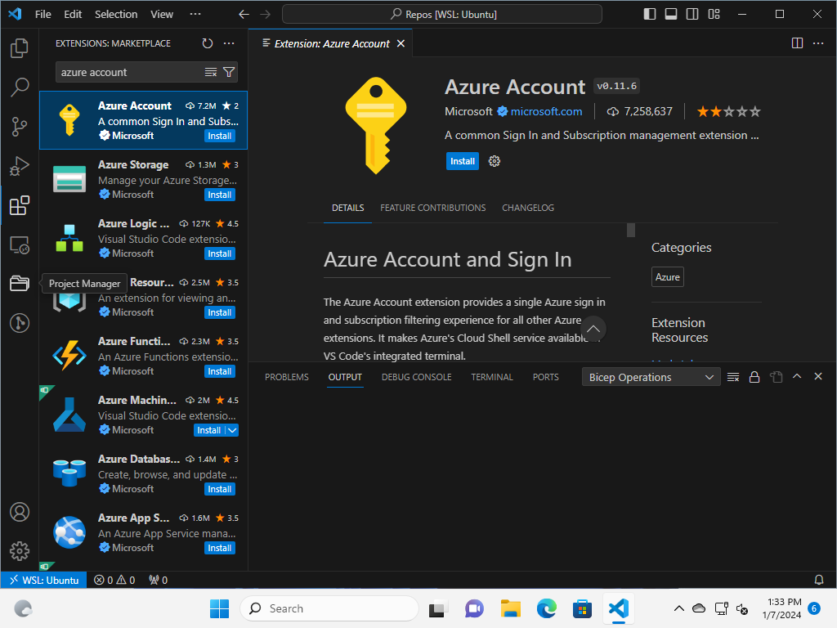
c. Install Azure Account extension for VSCode.
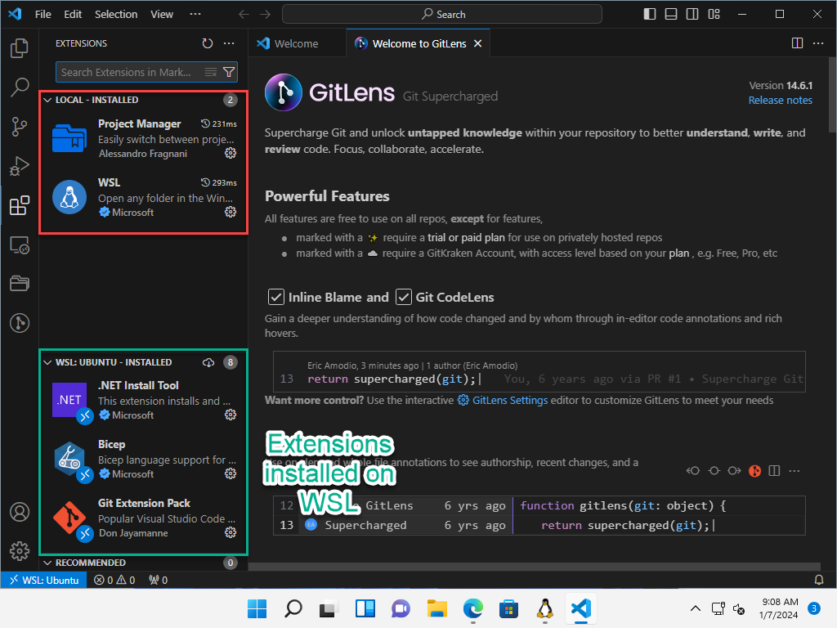
Navigate to the extensions section in VSCode, and you’ll notice that extensions are now categorized into two areas. The first area lists extensions set up and configured to work with our local development machine, while the second area pertains to those associated with WSL. Additionally, if you intend to author ARM Bicep templates on your local development machine, you’ll need to replicate the process upon switching back to your local environment through VSCode.
Start authoring
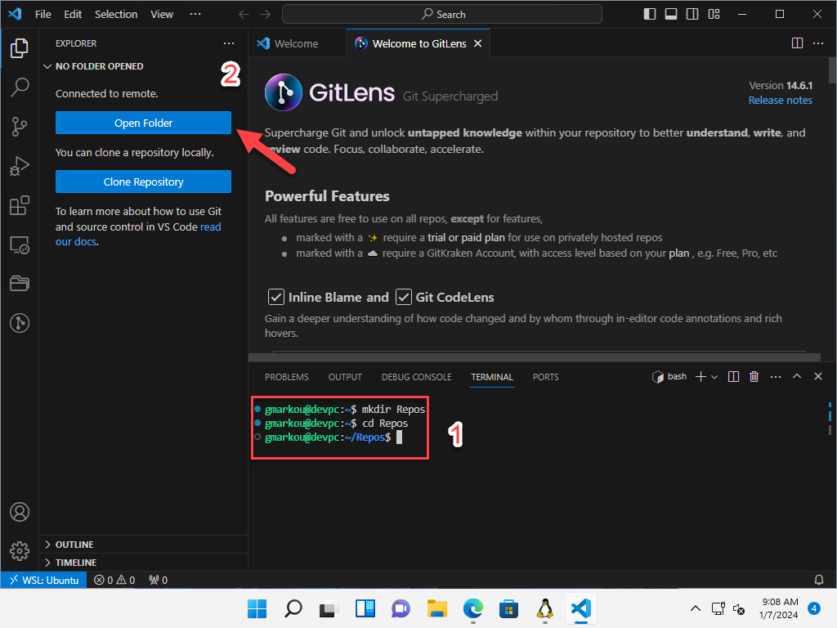
Now that everything is configured, you can begin creating ARM Bicep templates. Within VSCode, open a new terminal window and establish a new folder to store your artifacts. In the following example, we’ll generate a folder named ‘Repos’ within my WSL user’s home directory and navigate to it. Afterward, click the ‘Open Folder’ button and select the newly created folder within the WSL File System from the command palette.
Conclusion
Maintaining a clean workspace has become a habit I’ve cultivated over the years. The combination of WSL2 and VSCode forms a winning partnership, enabling the development of ARM Bicep templates while ensuring a tidy and organized local development environment. As an infrastructure enthusiast, my journey has revolved around nurturing Windows systems while diving into the realms of public cloud for the past decade. Though deeply entrenched in PowerShell, I’m always eager to explore new technologies, upskill across different domains, and optimize my workflow. This approach isn’t limited to ARM Bicep, it extends its benefits to individuals working with other Infrastructure as Code (IaC) tools like Terraform or Pulumi. So why hesitate? Dive in and relish the experience of learning something new. Well, ‘new’ in a sense, given that WSL has been around for quite some time.
Let me know what you think in the comments below.
Thanks for reading my blog!
You must be logged in to post a comment.